
Data migration is often viewed as an overhead, as part of the system setup, therefore the effort and technique utilized for data migration should be straightforward, including less work and established solutions that provide source-to-destination data mapping and validation.
High-end ETL tools like Informatica, SAP BO, SAS, and Oracle Warehouse Builder (OWB) are often used for data migration, but they may not be necessary for every project. Low-end ETL tools can also be employed for data migration.
End up developing bespoke PL/SQL scripts to accomplish the migrations, which may be time consuming and error prone, rather than utilizing the database’s out-of-the-box functionalities.
The purpose of this article is to offer an overview of Oracle’s many data migration choices, as well as a comparison table on several crucial criteria. The comparison of various methodologies will aid in the evaluation and selection of the most appropriate data.
According to the project’s requirements, we’ll use a migration method. We are certain that this article will be helpful to technocrats interested in data transfer as a handbook guide, but it is not a one-stop solution for all data migration demands. If your data movement requires additional migration capabilities that these choices cannot provide, it is advised that you look into advanced ETL products on the market.
Table of Contents
Process of Data Migration
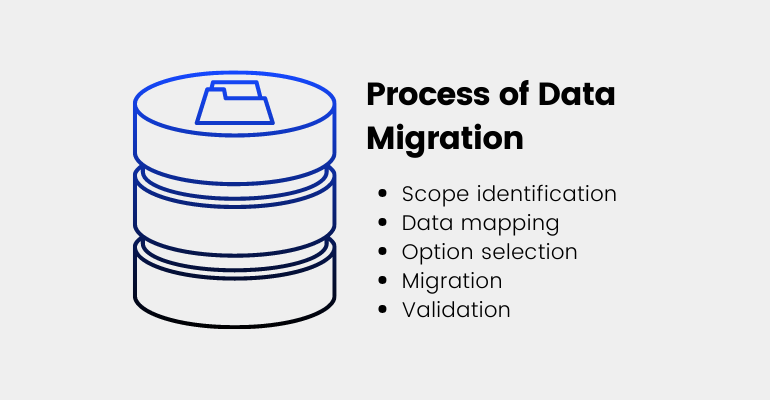
The data migration process entails the following phases at a top standard:
1) Scope identification
For each item, find relevant objects and data that must be moved.
2) Data mapping
This entails mapping data from a source item to a destination object. Transformation and mapping would be required for migration if the source and target data models differed.
3) Option selection
Determine which migration option is best for you, based on your needs.
system requirements, such as time and target database, as well as data requirements, such as transformation and volume.
4) Migration
Use the chosen solution to migrate data to the destination system.
5) Validation
Validate and certify data at the destination by conducting audits, validations, and acceptance tests.
There are several methods for moving an Oracle database from one platform to another. RMAN is one of the most well-known database migration methods. In this post, we’ll show you how to migrate a database from Windows to Linux via Oracle Data Pump.
- Data Pump Oracle Database Migration From Windows to Linux (Same version)
- Data Pump Oracle Database Migration From Windows to Linux (higher version)
Data Pump Oracle Database Migration From Windows to Linux (Same version):
The most significant advantage of Data Pump is that it allows you to upgrade, move, and optimize your database all at once!
The source and destination databases are both 12c.
Complete the pre-requisites on the Source Database before proceeding.
- Check the tablespaces on the source database and make sure they exist on the destination database as well. Create source tablespaces on the destination database if necessary.
| run on source & target SQL> select tablespace_name from dba_tablespaces; |
- Size of the Source Database should be checked
| select ( select sum(bytes)/1024/1024/1024 data_size from dba_data_files ) + ( select nvl(sum(bytes),0)/1024/1024/1024 temp_size from dba_temp_files ) + ( select sum(bytes)/1024/1024/1024 redo_size from sys.v_$log ) + ( select sum(BLOCK_SIZE*FILE_SIZE_BLKS)/1024/1024/1024 controlfile_size from v$controlfile) “Size in GB” from dual; |
- Invalid Objects in the Source Database should be compiled.
| SQL> @?/rdbms/admin/utlrp.sql |
- In the Source Database, look for the invalid count.
| SQL> select count(*) from dba_objects where status=’INVALID’; |
Now it’s time to export the database
- In the OS and database, create a directory for exporting the source database.
| SQL> create or replace directory export as ‘C:\migrate’; |
- To export a database, run data pump with the full=y argument.
| expdp directory=export dumpfile=fulldb.dmp logfile=fulldb.log full =y |
- Create an impdp directory on the destination host.
| mkdir -p /u01/export SQL> create or replace directory export as ‘/u01/migrate; SQL> GRANT read, write ON DIRECTORY export to sys; |
- With WinSCP, copy the dump files from the source host to the destination server.
On Target, begin the import procedure
| impdp dumpfile=FULLDB.DMP logfile=fulldb.log directory=export full=y |
- Check to see whether any non-default schemas or users were moved.
| SQL> select username from dba_users where ORACLE_MAINTAINED=’N’; |
- To compile invalid objects, run utlrp.sql.
| SQL>@$ORACLE_HOME/rdbms/admin/utlrp.sql |
Data Pump Oracle Database Migration from Windows to Linux (higher version)
The database exporting procedure is the same as in the prior situation. The import procedure is identical to the export and import procedures for the same version.
The source database is 12c, whereas the target database is 19c.
- Create the impdp directory in the target 19c database.
| SQL> create or replace directory expdata as ‘/u01/expdata’; |
- On Target, begin the import procedure.
| impdp dumpfile=FULLDB.DMP logfile=fulldb.log directory=export full=y |
- The problem is caused by the fact that some of the items have previously been shown. TARGET Compiles Invalid Objects.
| SQL> @?/rdbms/admin/utlrp.sql |
- Once you’ve completed the preceding steps, use the command below to check the target database.
| SQL> select count(*) from dba_objects where status=’INVALID’; |
- Count the CONSTRAINTS in both the source and destination.
| SQL> SELECT constraint_type, count(*) AS num_constraints FROM dba_constraints GROUP BY constraint_type; |
Done!
See also
How to Migrate Oracle Database to Cassandra and Activities for Data Preparation